

Dear Noteflighters (or Notepilots, as some of you prefer to be called),
In our travels on the forums, on our user support line, and in discussions with composers, students, and teachers (including me, working with my students as my alter-ego the composition teacher), we hear a lot of things about Noteflight: mostly tales of joy and musicality, a few tales of puzzlement (which we help resolve right away!), and then always those tales of… “oh hey! I didn’t know Noteflight could do that!”
Yes, we regularly see things that users can do to make their music-making in Noteflight smooth, fast, fun, and trouble-free. Our User Guide gives the full picture, but we want to share a few highlights and “best practices”, tips from our users, things that “just work”, and cool tricks you might not know yet.
First, and so unbelievably-incredibly-fanstastically important that it deserves its own drum roll….
SAVE! OFTEN!
It’s quickest to use control-S (watch out: on some browsers command-S saves the whole web page to your hard drive, which is not what you want), or one of these options:
If the button looks like this, your latest changes may not have been backed up yet!
When it looks like this, you’re safe:

This is a habit thing: if you train yourself to save all the time, even every few seconds, you’ll stop noticing and it will just happen…and you’ll be so glad you did. If Benjamin Franklin had had Noteflight, he would have added frequent saving to his list of 13 virtues.
A few of our favorite keys
Get to know our Keyboard Shortcuts (a complete list here). You won’t regret it!
Here are a few of our favorites. These will instantly increase your love of Noteflight!
P is for Play
Instead of the Play button, or using the option in the Play menu, just press:

to play from the beginning, or
Shift-P to play from the currently-selected measure.
R is for Repeat
Select any part of your score: a single note, a chord, a whole bar, a series of bars… press:

…and voilà! It shall be repeated, as many times as you wish. This is also a handy way to add new bars: select an empty bar, hit R a million or so times, and you will have measures to fill with glorious music until the end of time.
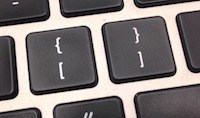
Bracket Keys to change Duration
One of the most useful of all: to change the note duration, use the bracket keys:
[ makes the note shorter (quarter/crotchet to 8th/quaver, or 8th/quaver to 16th/semiquaver)
] makes the note longer
Move notes one step higher or lower: use the Up / Down arrow keys
![]()
Move notes up or down one octave: hold Control/Command and press the Up / Down arrow keys
A few other handy keystrokes:
Break or connect a beam: shift-[ and shift-]
Tie vs Slur
One of music notation’s most confusing tricks: two things that look exactly the same, but mean completely different things! Meet the tie and the slur.
For a tie, to connect two of the same pitch into one longer duration, type a comma: ,
For a slur, to show smooth playing between different pitches, type the S key
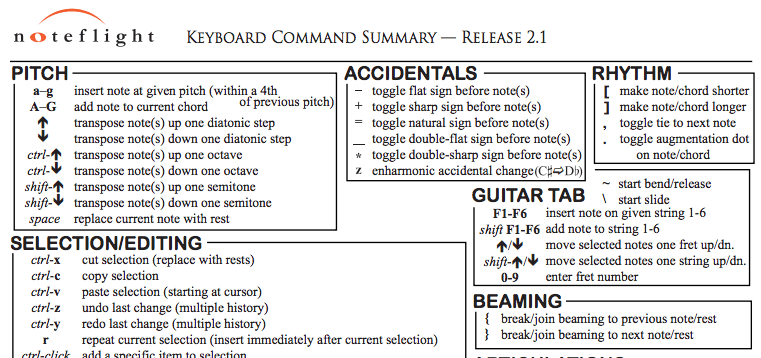
Here is a sample from our complete list of Keyboard Shortcuts… click the image to see the full list!
Sharing Your Scores
Noteflight is a great notation editor, and our heart and soul is in helping you to create music. But Noteflight’s sharing features make it something more: the ability to instantly share, collaborate, comment, follow, and favorite make Noteflight a community. Each score, like a Google Drive document or Youtube video, is a unique web page with an address on the internet which you, as owner and creator of that score/web page, can control access to. The default setting keeps it private, visible only to you, just as it would be if it were a file on your hard drive.
But just like a Youtube video, if you want to send your score to a friend for feedback — or for them to add the brass section as part of a collaboration, perhaps — just copy-paste the link into an email, blog, even a text message, and they can open it instantly…
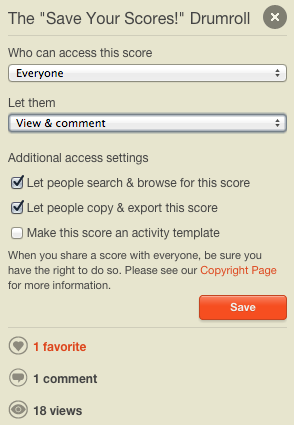
…IF you have set the sharing options to let them see it. That’s why the Sharing Panel is so important: for your colleagues, students, and friends to see your score, you must SHARE your score. The default is set to private, so this doesn’t happen automatically.
Please review the section on Sharing in our User Guide for complete details on how to share and publish your scores on Noteflight.
Save your score as a PDF
You can do this in the Score palette, under Print. But the easiest way is in the same palette under Export then choose the PDF option.
Teachers! The Sites menu
If you are the administrator of a Noteflight Learn site, keep in mind the left panel that opens up when you click the Noteflight icon on the upper left. This is where you can switch between your scores on our public site at www.noteflight.com and your private school site(s), which have a different web address:
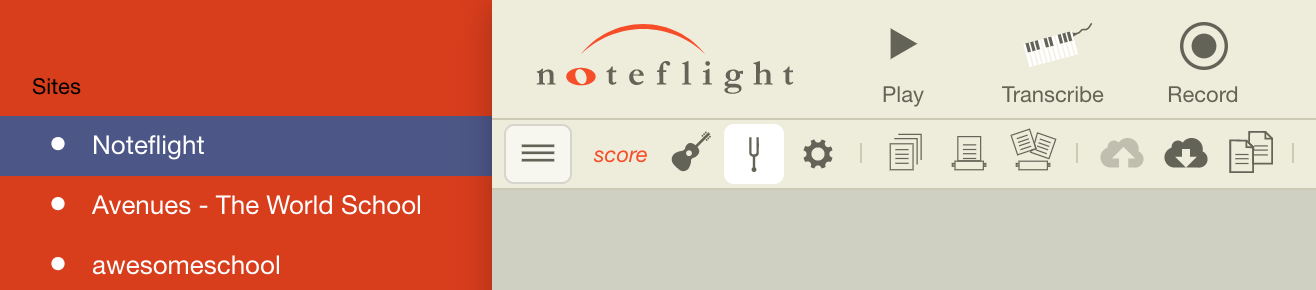
If you are not seeing the scores you want, check the web address URL and if it says www.noteflight.com, switch to your school site in the Sites menu!
*If you are a teacher or student in a Teacher, Studio, or Classroom site, but not the admin, this doesn’t apply.
Other good things to know
Change part names right in the margin!
Yup: just double click the part name, then rewrite it as you see fit. If you’re writing for an instrument we don’t have yet, you can use an instrument we do have, and then put the correct name in for the player to read. Or if your friend Julia is playing the clarinet part, you can put her name right in there next to the clarinet staff!
How do rests work in Noteflight?
In Noteflight, a rest occurs when there is no note — there can’t be a gap in the bar. So if you select a note and hit Delete/Backspace, Noteflight automatically fills in a rest of the same value.
First and Second endings
In the Repeat palette you will then see the “first ending” symbol, with a 1 and a line following it.
To create the second ending, add another first ending and double click the “1” to get the blinking cursor, then replace it with a “2”.
You can apply an “incoming tie” to the first note in the second ending. This symbol is on the Duration palette:

Need a second line of lyrics? So easy, it’s easy to miss! Just double click the first syllable of the first line of lyrics: you need the blinking cursor. Then, just hit Return/Enter. It will jump to the second line, and you can continue typing your second (and third, and fourth) verses.
Hymns or Folk songs? Add verses at the bottom
For hymns or folk songs, sometimes you want to add additional verses at the end in block text format. Select a note in the middle of the bottom staff. Then type “T” to create a new text item with blinking cursor. Then type the lyrics, adding line breaks where needed. Then click somewhere else in the window to “set” the text (get rid of the blinking cursor). Then drag the text item where you need it to go.
Work with parts right inside your score
Click on the Instruments button at the top of the screen, and show or hide any combination of parts you need. Read more here.
Hide Time Signatures or Bar Lines
Sometimes for a school exercise, or Gregorian chant, or the like, you don’t want to show the time signature and bar lines. You can hide them!
Click the time signature to open the “change time signatures” box. Choose whatever value will give you enough space to add all the notes you need – for example if you want 6 quarters and two 8ths, you could choose a “7/4” time signature – THEN, click “hidden” before you close that box, and you’ll get a measure with enough space but no visible time signature.
To hide bar lines: click the bar line and in the box that pops up (or in the Measures palette, choose the dotted line.
Hide Cautionary Time Signatures and Key Signatures
Don’t want that “extra” time signature or key signature at the end of a line to warn the reader of a change on the next line? Select the bar line, hold down the Control key, and hit return/enter!
Import scores from other notation programs
Have a score you created elsewhere, and you want to work with it in Noteflight? Easy!
1. Export as XML (not MXL) from the other program, and save it to your hard drive.
2. Open a new score in Noteflight, and pick any instrument (it will be replaced after import)
3. New Score > import > choose your XML file
Result: a Noteflight score you can edit (you should look through and make any needed fixes)
Lost your Metronome Mark?
Have you deleted the metronome marking and you can’t get it back? Just change the number in the little box at the bottom, and the mark reappears. Then you can change the number back.
Last but not least…
Be creative and look for workarounds!
This can mean a lot of things, so here’s an example:
Split one measure between two systems
1. Create two measures in place of the one you want to split.
2. Change both time signatures so that together they add up to the original time signature; for example if the music is in 4/4 time and you want to split a measure into three beats plus one beat, use 3/4 and 1/4…
…BUT before you close the time signature dialog each time, choose “hidden”.
3. Select the bar line after the “3/4” bar and hit return/enter to create a system/line break.
4. Select the same bar line, which is now at the end of a line, and make it invisible by choosing the dotted line bar line option.
5. You’ll end up with a “corrective” time signature back to 4/4, and you may end up with an extra measure or two. Delete those bars, and to hide the 4/4 use the “hidden” button in the Time Signatures dialog again.